PowerPoint: 4 Hidden SmartArt Tricks
Microsoft expert reveals four SmartArt animation techniques for PowerPoint using Morph, motion paths and pro tricks
Key insights
- Quick summary: This YouTube tutorial demonstrates four practical SmartArt animation techniques to make diagrams look more professional.
It focuses on using SmartArt in PowerPoint with everyday tools like Morph and Motion Paths. - Highlight one point: Use Morph or duplicate slides to spotlight a single list item.
Change the target shape’s color, size, or position on the duplicate slide and apply Morph to create a smooth, click-driven focus. - Reveal ideas naturally: Use Motion Paths or sequential entrance effects so items appear in logical order.
Control order and timing with the Animation Pane and use "On Click", "With Previous", or "After Previous" to match your narration. - Present long timelines clearly: Break long timelines into stages and reveal each stage step-by-step.
Use fades, simple motions, or staged groups to avoid overwhelming viewers and to guide attention along the timeline. - Create a moving highlight: Overlay a semi-transparent shape or a shape that follows a path to sweep across items for emphasis.
Combine the moving shape with Morph or motion path timing for a polished, professional highlight effect. - Practical mechanics & tips: Select the SmartArt, open the Animations tab, choose an effect, then set Effect Options like As One Object or Level One by One.
Use the Animation Pane to refine order and timing, keep animations simple, and test on the actual display before presenting.
Introduction
The video from Presentation Process YouTube shows four practical animation techniques for Microsoft SmartArt that aim to make slides look cleaner and more professional. Moreover, the tutorial focuses on combining existing PowerPoint tools such as the Morph Transition and Motion Paths with a few simple tricks to get effects that are not obvious at first glance. Consequently, the piece argues that presenters can avoid the usual robotic animations and instead guide the audience’s attention more naturally.
Importantly, the creators demonstrate how to animate lists, timelines, and emphasis highlights without relying on new software features, because the effects are built from current PowerPoint capabilities. Therefore, viewers can reproduce the techniques using Office 365 or recent PowerPoint releases. Finally, the video positions these methods as accessible to anyone willing to spend a little time preparing slides.
The Four Techniques Explained
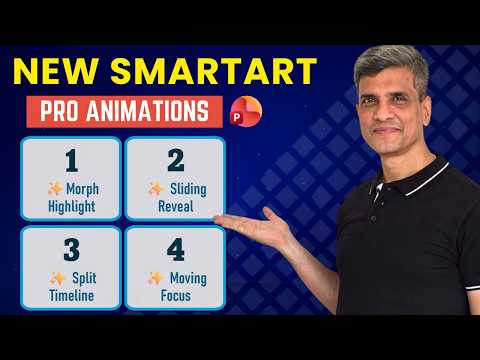
The first technique, labeled “Highlight One Point at a Time,” shows how to reveal bullet points or list entries sequentially, so the audience focuses on one idea before moving to the next. The tutorial recommends using animation options set to Level One by One or to animate shapes separately, and then fine-tuning timing with the Animation Pane. As a result, presenters can avoid overwhelming viewers with too many items at once.
The second method uses Motion Paths to “Reveal Ideas Like a Pro,” which effectively moves elements into place rather than simply fading them in. In practice, presenters draw short motion paths and align them so the movement looks intentional and smooth, and then synchronize motion with other effects. Consequently, this feels more natural and can mimic a storyline moving forward.
The third trick addresses long timelines and demonstrates how to break them into digestible stages so that an extended sequence does not overwhelm the audience. The creators suggest grouping timeline segments and revealing them progressively, sometimes using the Morph Transition to create smooth spatial changes between slides. Therefore, you can present complex sequences clearly while keeping the slide visually simple at every step.
The fourth technique creates a moving highlight effect that tracks attention across a diagram, enabling a single shape to stand out while others recede. By combining small motion paths, color changes, and carefully timed animations, the highlight appears professional and unobtrusive. Thus, presenters can emphasize a process flow or decision point without distracting motion or clutter.
Practical Workflow and Steps
First, the video advises selecting the SmartArt graphic and choosing an appropriate animation effect such as Fade, Fly In, or Wipe before adjusting Effect Options. Next, the presenter opens the Animation Pane to reorder and tweak timing, which is essential for making multi-shape sequences feel refined and synchronized. In addition, the creators recommend testing each step in Slide Show mode to confirm that motion and timing match the spoken script.
Moreover, the tutorial emphasizes combining slide-to-slide Morph Transition when you need smooth repositioning of shapes between states, because this transition preserves visual continuity. Meanwhile, Motion Paths are useful for precise in-slide movement when you want an element to travel to a new location without jumping. Finally, using grouping and careful naming in the Animation Pane reduces confusion and speeds up future edits.
Tradeoffs and Challenges
Although these techniques improve clarity and engagement, tradeoffs exist between setup time and presentation payoff; creating precise motion often requires several minutes per slide. Furthermore, overly complex animation can increase the cognitive load if timing and sequencing are not carefully controlled, so presenters must balance polish with simplicity. Therefore, it helps to limit animations to moments that genuinely aid understanding.
Compatibility also poses a challenge because different PowerPoint versions or exports can change behavior; for instance, animations may not translate to PDF or older Office releases. In addition, motion-heavy slides can strain performance on slower devices, which can lead to skipped frames or stuttering during live delivery. Consequently, presenters should test slides on the target device and be prepared with a static fallback slide if needed.
Another difficulty is ordering and layering when many shapes animate separately, which can create accidental overlaps or timing conflicts. Although the Animation Pane provides control, it can become crowded, making it harder to visualize the sequence. Hence, grouping related shapes and naming animation entries is a practical way to manage complexity while keeping the slide editable for later changes.
Conclusion and Recommendations
In summary, the video from Presentation Process YouTube offers accessible methods for animating SmartArt more effectively by combining Morph Transition, Motion Paths, and careful use of the Animation Pane. Thus, presenters who invest modest time in setup can achieve a cleaner, more professional result that guides audience attention. However, they should weigh the benefits against the time required and the risk of compatibility issues.
Finally, for practical use, start by applying these techniques to a single key slide and then expand them selectively across your deck. In addition, always rehearse on the device you will use for delivery and consider simplified alternatives for distribution formats that do not support animations. Overall, when applied thoughtfully, these SmartArt animation techniques can significantly improve message clarity and audience engagement.

Keywords
hidden SmartArt animations, PowerPoint SmartArt tips, animate SmartArt in PowerPoint, advanced SmartArt effects, SmartArt animation techniques, creative SmartArt transitions, unlock SmartArt animations, SmartArt motion effects